How to Build a WordPress Website from Scratch 7 Easy Steps 2025

Have you ever wanted to start your own website, but didn’t know how? WordPress is a great platform that makes it easy for anyone to get started. In this post, I’ll show you how to build a WordPress website from scratch for beginners.
You’ll learn how to set up your domain name and hosting, install WordPress, and configure your settings. You’ll learn this guide within a day so let’s get started!
What is WordPress
WordPress is a content management system, or CMS. That means it helps you to create a website or blog from scratch and manage your website’s content from thereon. You can use WordPress to create a simple blog or a complex website.
One of the reasons WordPress is so popular is that it’s easy to use. Even if you’re not technically inclined, you can still create a professional-looking website with WordPress.
Another reason to love WordPress is that it’s flexible. There are thousands of themes and plugins available
Some websites that use WordPress:
Steps to Build a WordPress Website From Scratch
- Choose a domain name
- Choose a web hosting service
- Install WordPress on your web host
- Select and Install a theme
- Install necessary plugins
- Customize your website
- Add contents
Step 1: Choose a Domain Name
Estimated time of completion: 5-10mins
A domain name is a unique website address that consists of letters and numbers. For example, my domain name is EasyRocketStudio.com – you need to type that into a web browser so you can visit this website.
What will you need?
You need a domain name registrar to register your domain. I recommend Namecheap. They have affordable pricing with free Whois Privacy for life!
If you still don’t have a domain name, you can check out this amazing tool that will generate hundreds of domain name ideas.

Follow these steps
- Go to Namecheap and register an account
- Type in your domain name you want to register in the search box
- Register your domain if available
We’ll get back to Namecheap once we are done with choosing a web hosting service.
Step 2: Choose a Web Hosting Service
Estimated time of completion: 10-20mins

What exactly is web hosting? In layman’s terms, web hosting is simply providing a space for a website to exist on the internet. However, there is more to it than that.
Web hosting provides the server resources that are necessary for a website to function properly. This includes things like storage space, bandwidth, and access to certain software programs. Without these things, a website would not be able to operate properly or be accessible to users.
There are different types of web hosting plans that offer different levels of resources and services. Some plans are designed for personal use, while others are meant for businesses. It’s important to choose the right plan for your needs in order to ensure that your website can run smoothly.
My recommendations:
- Cloudways – Easy to use and can deploy WordPress in minutes. And, they offer 3-day free trial.
- Hostinger or Bluehost – Best for beginners as they have affordable web hosting solutions.
- Rocket.net – For a need for speed, security and scalability without minding the budget. Read our review about Rocket.net. (This site is hosted on Rocket.net)
I don’t recommend VPS hosting or a dedicated hosting just yet since these are high-powered servers for high traffic websites.
If you want to try some web hosting, there are some that offer free trials.
Step 3: Install WordPress on your Web Host
Estimated time of completion: 10-20mins
For this tutorial, I’ll be using Cloudways to deploy WordPress.
Register on Cloudways. Take note that they will manually verify you for security purposes. For easier registration and faster verification, use your LinkedIn or GitHub account to register.


Launch the server of your choice. I have chosen Digital Ocean 2GB Intel London.

Wait for 7 minutes for Cloudways to prepare your server. Cloudways will automatically install WordPress once the server has launched.
Once the server has launched, click www and click Your Application to get access credentials for your WordPress website.

You will then be redirected to to the Access Details panel. You will see your WordPress URL under the Application URL.
Under the Admin Panel, you will see the login URL and credentials for your WordPress website. This is where you can access your WordPress administrative panel.

You now have a fully installed WordPress website with a default theme!

Next, add your domain name on Cloudways Platform. On the left side bar, look for Domain Management under Application Management.

Enter your domain name you registered on Namecheap. Click Save Changes.

Wait for few seconds for Cloudways to update your domain.

Now it’s time to point your WordPress website to your domain name. Go back to Namecheap.
On the domain list, click Manage.


Next, click the Advanced DNS. We will create two A records.
- Under Type choose A Record.
- Under Host, input @ for the first row and www for the second.
- Under Value, copy the public IP from your Cloudways Application Credentials (see next screenshot).
- Under TTL (time to live), choose 1 min or Automatic.
Be sure to save the changes by clicking the check icons.


Wait for 24 hours to fully propagate your DNS. In my experience, I can access my website immediately but intermittently since it is still propagating.
You can check whether your DNS is propagating through this tool.
Lastly, we’ll add SSL certificate for your website to use https on all pages to secure the connection of your website.
Go back to your Cloudways Application Management.
Choose SSL Certificate and choose Let’s Encrypt. Add your email address and your domain name. Hit Install Certificate. Wait for a few minutes for your SSL to be installed.

Next, test your website if you have properly installed the SSL certificate. I use a free tool like sslshopper to test my website.

You can now access your website by typing your domain name into your preferred browser.
Step 4: Select and Install a Theme
Estimated time of completion: 5-10mins
WordPress has a lot of themes in its theme repository. To save you time to browse which theme to choose, these are the themes I’ve used:
Kadence – It’s fast and easy to configure and includes one-click demo install plugin to the demo template of your choice. Includes many free demo templates. This site uses this theme.
Newspaper – This theme is one of the best sellers in ThemeForest. It’s a news/magazine theme. If you want to make your WordPress website big, then you might consider this theme.
GeneratePress – One of the fastest-loading theme in WordPress theme repository. Includes few free demo template.
WPAstra – This theme is another fastest-loading theme next to GeneratePress. One of the good things this theme has is it’s hundreds of ready-to-import templates.
For this tutorial, we’ll use WPAstra and install a free starter template.
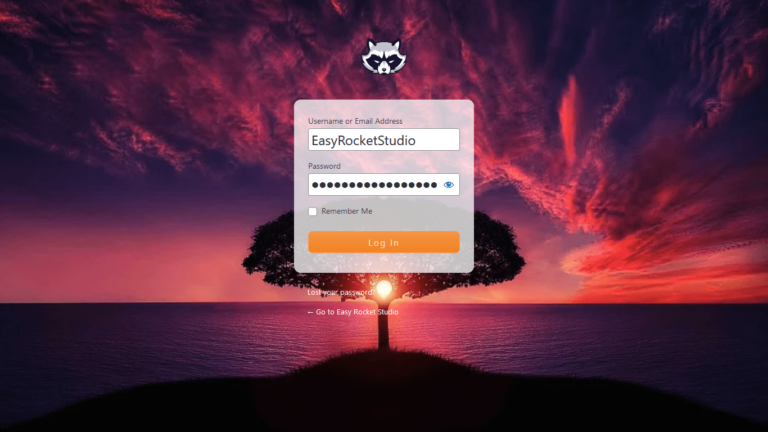
First, login to your WordPress website using the username and password provided by default on Cloudways. The admin URL for your newly pointed website would now be: yourwebsite.com/wp-admin
You can also access it on Application Management > Access Details > Admin Panel.
From your WordPress website dashboard, navigate to Appearance > Themes.

Click Add New. By default, WordPress automatically installs its latest theme.

Search for Astra. Click install and activate.

Go back to Appearance. Click Astra Options and Install Importer Plugin.

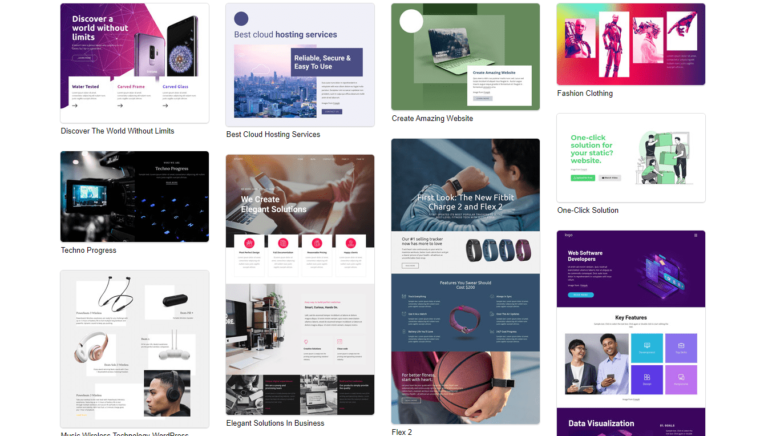
Choose your desired template to install. There are a lot available from sports, to travel to home. I’ll be choosing Outdoor Adventure.

You’ll be prompted to upload your logo, colors and font but just hit Skip and Continue. Click Submit & Build My Website.

Finally, you have installed the template of your choice!


Step 5: Install Necessary Plugins
Estimated time of completion: 5-10mins
Plugins are necessary to make your site functional. The following plugins are my necessary tools:
- WPForms Lite – Install this plugin to create a contact form needed for your Contact page. For detailed tutorial on how to create a contact form, follow this guide.
- Rank Math SEO – Use this plugin to enhance your content’s search engine optimization.
- iThemes Security – Secure your website from hackers and DDOS attack.
- WP-Optimize – Better enhancement of your website loading speed.
- Akismet Anti-Spam – Spam bots are everywhere that’s why you need this plugin to mitigate spam comment bots.
How to install these plugins?
From your dashboard, navigate to Plugins and Add New.

Search for the plugin name and then install and activate.

Step 6: Customize Your Website
Estimated time of completion: 15-30mins
Now that you’ve learned how to install and configure a theme, as well as to install plugins, it’s time to configure your WordPress website.
Part1: Add your logo and site icon.
Go to Appearance > Astra Options.

Click Upload Logo.
![]()
Upload your logo and site icon. If you don’t have a logo yet, you can create free on Namecheap logo maker. It’s free :).
![]()
Part 2: Go to your WordPress website’s setting and configure all the options.

General – Be sure to add https in your WordPress Address and Site Address.
Writing – Leave the default settings.
Reading – Leave the default settings.
Discussion – On Before a comment appears option check the two settings and save.
Media – Leave the default settings
Permalinks – Choose Post name and save changes. If you want to run a news website, choose Day and name.
Step 7: Add Contents
Estimated time of completion: 15-25mins
Now the last part will be adding contents on your website.
But first, how will you use your WordPress website for? Examples are to start a blog, create a portfolio or an affiliate website or sell course or book. This is very crucial because that will depend on how you’ll grow your website from hereon.
Below are some examples of website with different purpose.
Adventurous Kate – Example of a blog in the travel niche.
Gione da Silva – A wedding photography website.
Wirecutter – Example of an affiliate website.
Gretchen Rubin – An website that sells books.
Next, You should tell your visitors about your website and who is behind it.
For that, you need to write:
About Us for a company or About Me if you’re sole owner. If you don’t have any idea how to write an About page, this article might help.
Privacy policy – Tell your users how you collect information when they visited your website. WordPress has a template for that or you can use a free privacy generator.
Contact Us – Some visitors might inquire information about your website and this page will let them know how to contact you. You will be embedding the form from WPForms Lite into this page.
If you don’t have a business email, read our tutorial on how to get a free email hosting using your domain name. For instance, if your domain name is myfirstwpwebsite.com, you will use an email address with it like [email protected].
Or if you’d like to spare few bucks, try a cheap email hosting.
Ho to add content on WordPress?
For articles, recipe, pillar or evergreen content, go to Post > Add New
For About Us, Contact, Privacy Policy and the like, go to Pages > Add New
Add your Title, Permalink and Content. Then hit Publish.
And finally, you have fully configured your WordPress website. By this time, you have a fully functional WordPress website you made from scratch.
What’s Next?
Promote your website online
- Optimize your website for search engines
- Set up Google Search Console and Bing Webmaster Tools
- Set up Google Analytics to track the behavior of your website
- Generate a sitemap and submit to Google Search Console and Bing
- Create Facebook page and other social media you want to promote your website
Why is WordPress the Best CMS to Use?
Here are some reasons:
- WordPress is free and open source.
- It is easy to use and has many features.
- There are many themes and plugins available.
- WordPress is also very flexible.
Summary
Here is the summary on how to build a WordPress website from scratch.
| Choose a domain name | Domain name is what you type in your web browser to access a certain website. Use Namecheap to find your domain name. |
| Choose a web hosting service | Web hosting is where you will be installing WordPress. Choose a fast and reliable like Cloudways, Hostinger or Rocket.net. Bluehost is also a great option for starters. They are recommended by WordPress itself. |
| Install WordPress on your web host | Installing WordPress is not that hard if you’re using Cloudways. Hostinger and Rocket.net also installs WordPress automatically for you. |
| Select and Install a theme | WordPress themes are available immediately when you access its directory from your administrative panel. GeneratePress, Kadence, Newspaper and WPAstra are some of the fastest and secure themes out there. |
| Install necessary plugins | Plugins make your WordPress website functional. Important themes such as Rank Math, WP Forms, iThemes Security, Akismet and WP Optimize are the best way to get started with. If you’re using Rocket.net hosting, there’s no need to install iThemes Security and Akismet. |
| Customize your website’s settings | This is the finishing touches of WordPress installation. Upload your logo and adjust your theme if you need to. WordPress settings are very important to configure. Don’t forget this step. |
| Add content and pages | Content is important if you want to build an online presence. Whether you’re writing a news or recipe, be sure you have a great content valuable to your readers. |
Congratulations, you now know how to build a WordPress website from scratch! This is an incredibly valuable skill that will serve you well for years to come. Not only have you learned the basics of web development, but you’ve also gained experience in one of the most popular content management systems on the planet.
Now it’s time to put your skills into practice and create something amazing. Are you ready to start building your own website? I can’t wait to see what you come up with!
Did you hit a road block? Comment down below and I’ll try my best to help you out.